There are at least two ways to connect to Wi-Fi on Windows 11. The first way is from the notification area from the bottom-right corner of the screen. The second way is from the system settings. The first way is much easier, which is what this tutorial will focus on. However, it is important to make sure that your wireless network is working beforehand to prevent any connection issues.
Step 1
Click the Internet icon from the bottom-right corner of the screen. Depending your connection status, it may also be the Wi-Fi icon.
Step 2
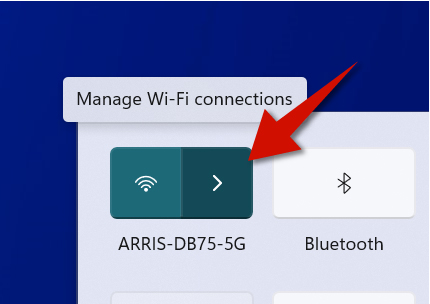
Click Manage Wi-Fi connections. You will then see a list of wireless networks nearby.
Step 3
Select your wireless network, enter the network key and then connect. Select Connect automatically to avoid having to reconnect each time.


