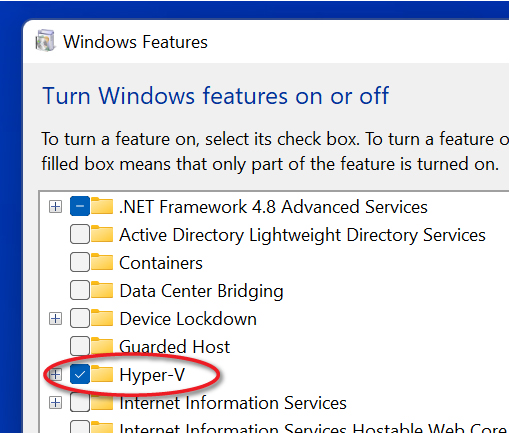
Hyper-V is a built-in hypervisor that for Windows 11 that lets you run virtualized operating systems on your PC. It is a type 1 (also known as a bare metal) hypervisor that runs as long as the hardware is running. Because of this, Hyper-V is powerful and reliable. Fortunately, enabling it is fairly simple. Here's how you can easily do so.
Step 1
Click the Windows search icon.
Step 2
Type Windows features in the search field and click Turn Features on or off.
Step 3
Scroll down and go to where it says Hyper-V. Click the checkbox to enable it. Next, restart your PC and you are done!
Make Sure Virtualization is Enabled First
In order to enable, Hyper-V harward virtualization must be enabled. If it is not enabled, you will notice that the option to enable Hyper-V is grayed out. You can easily do so from the BIOS or UEFI settings.


