While Microsoft does not recommend installing Windows 11 on an unsupported
computer, it does give you a simple workaround if you know what you are doing.
It is thus one of the easiest ways of installing Windows 11. In this tutorial
you will learn how to install Windows 11 as fast possible if your PC, CPU, or TPM version is
not supported. Let's start!
Step 1
Download the Windows 11 ISO from Microsoft. While the ISO is
downloading, please proceed to Step two through six to save time. You will work with ISO file on step seven, the last step.
Step 2
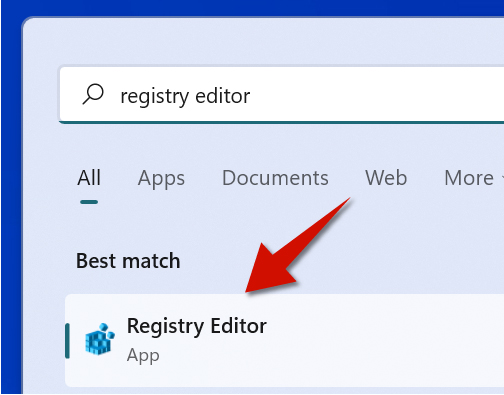
Search for Registry Editor and then choose it from the results. This will open the Registry Editor.
Step 3
Insert the following registry key into the search bar to go to setup registry settings.
HKEY_LOCAL_MACHINE\SYSTEM\Setup\MoSetup
Step 4
Right-click an empty area, hover the cursor on New and then select DWORD (32-bit) Value.
Step 5
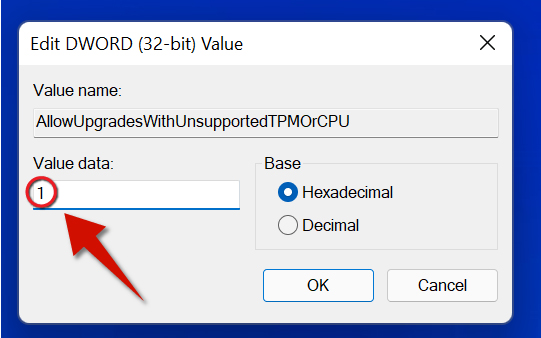
Give the value the following name.
AllowUpgradesWithUnsupportedTPMOrCPU
Step 6
Double-click the value and give it a value data of 1 and then click OK. You are all set! Now your computer will allow you to install Windows even if it is not supported.
Step 7
Open the ISO file (once it is done downloading) and then run the setup file (see Step 1). Now you can install Windows 11 without any issues.


